Category Archives: Food

Lauren: Orange Cinnamon Rolls

photo (4)Happy holidays friends! Welcome back to Cooking with Copy. It’s been getting quite festive around here lately between the sparkly tree, the music, and the three kinds of cookie dough chilling in the fridge. Sending care packages and buying washi tape have become my new hobbies, and sugar may as well be the base of the food pyramid.

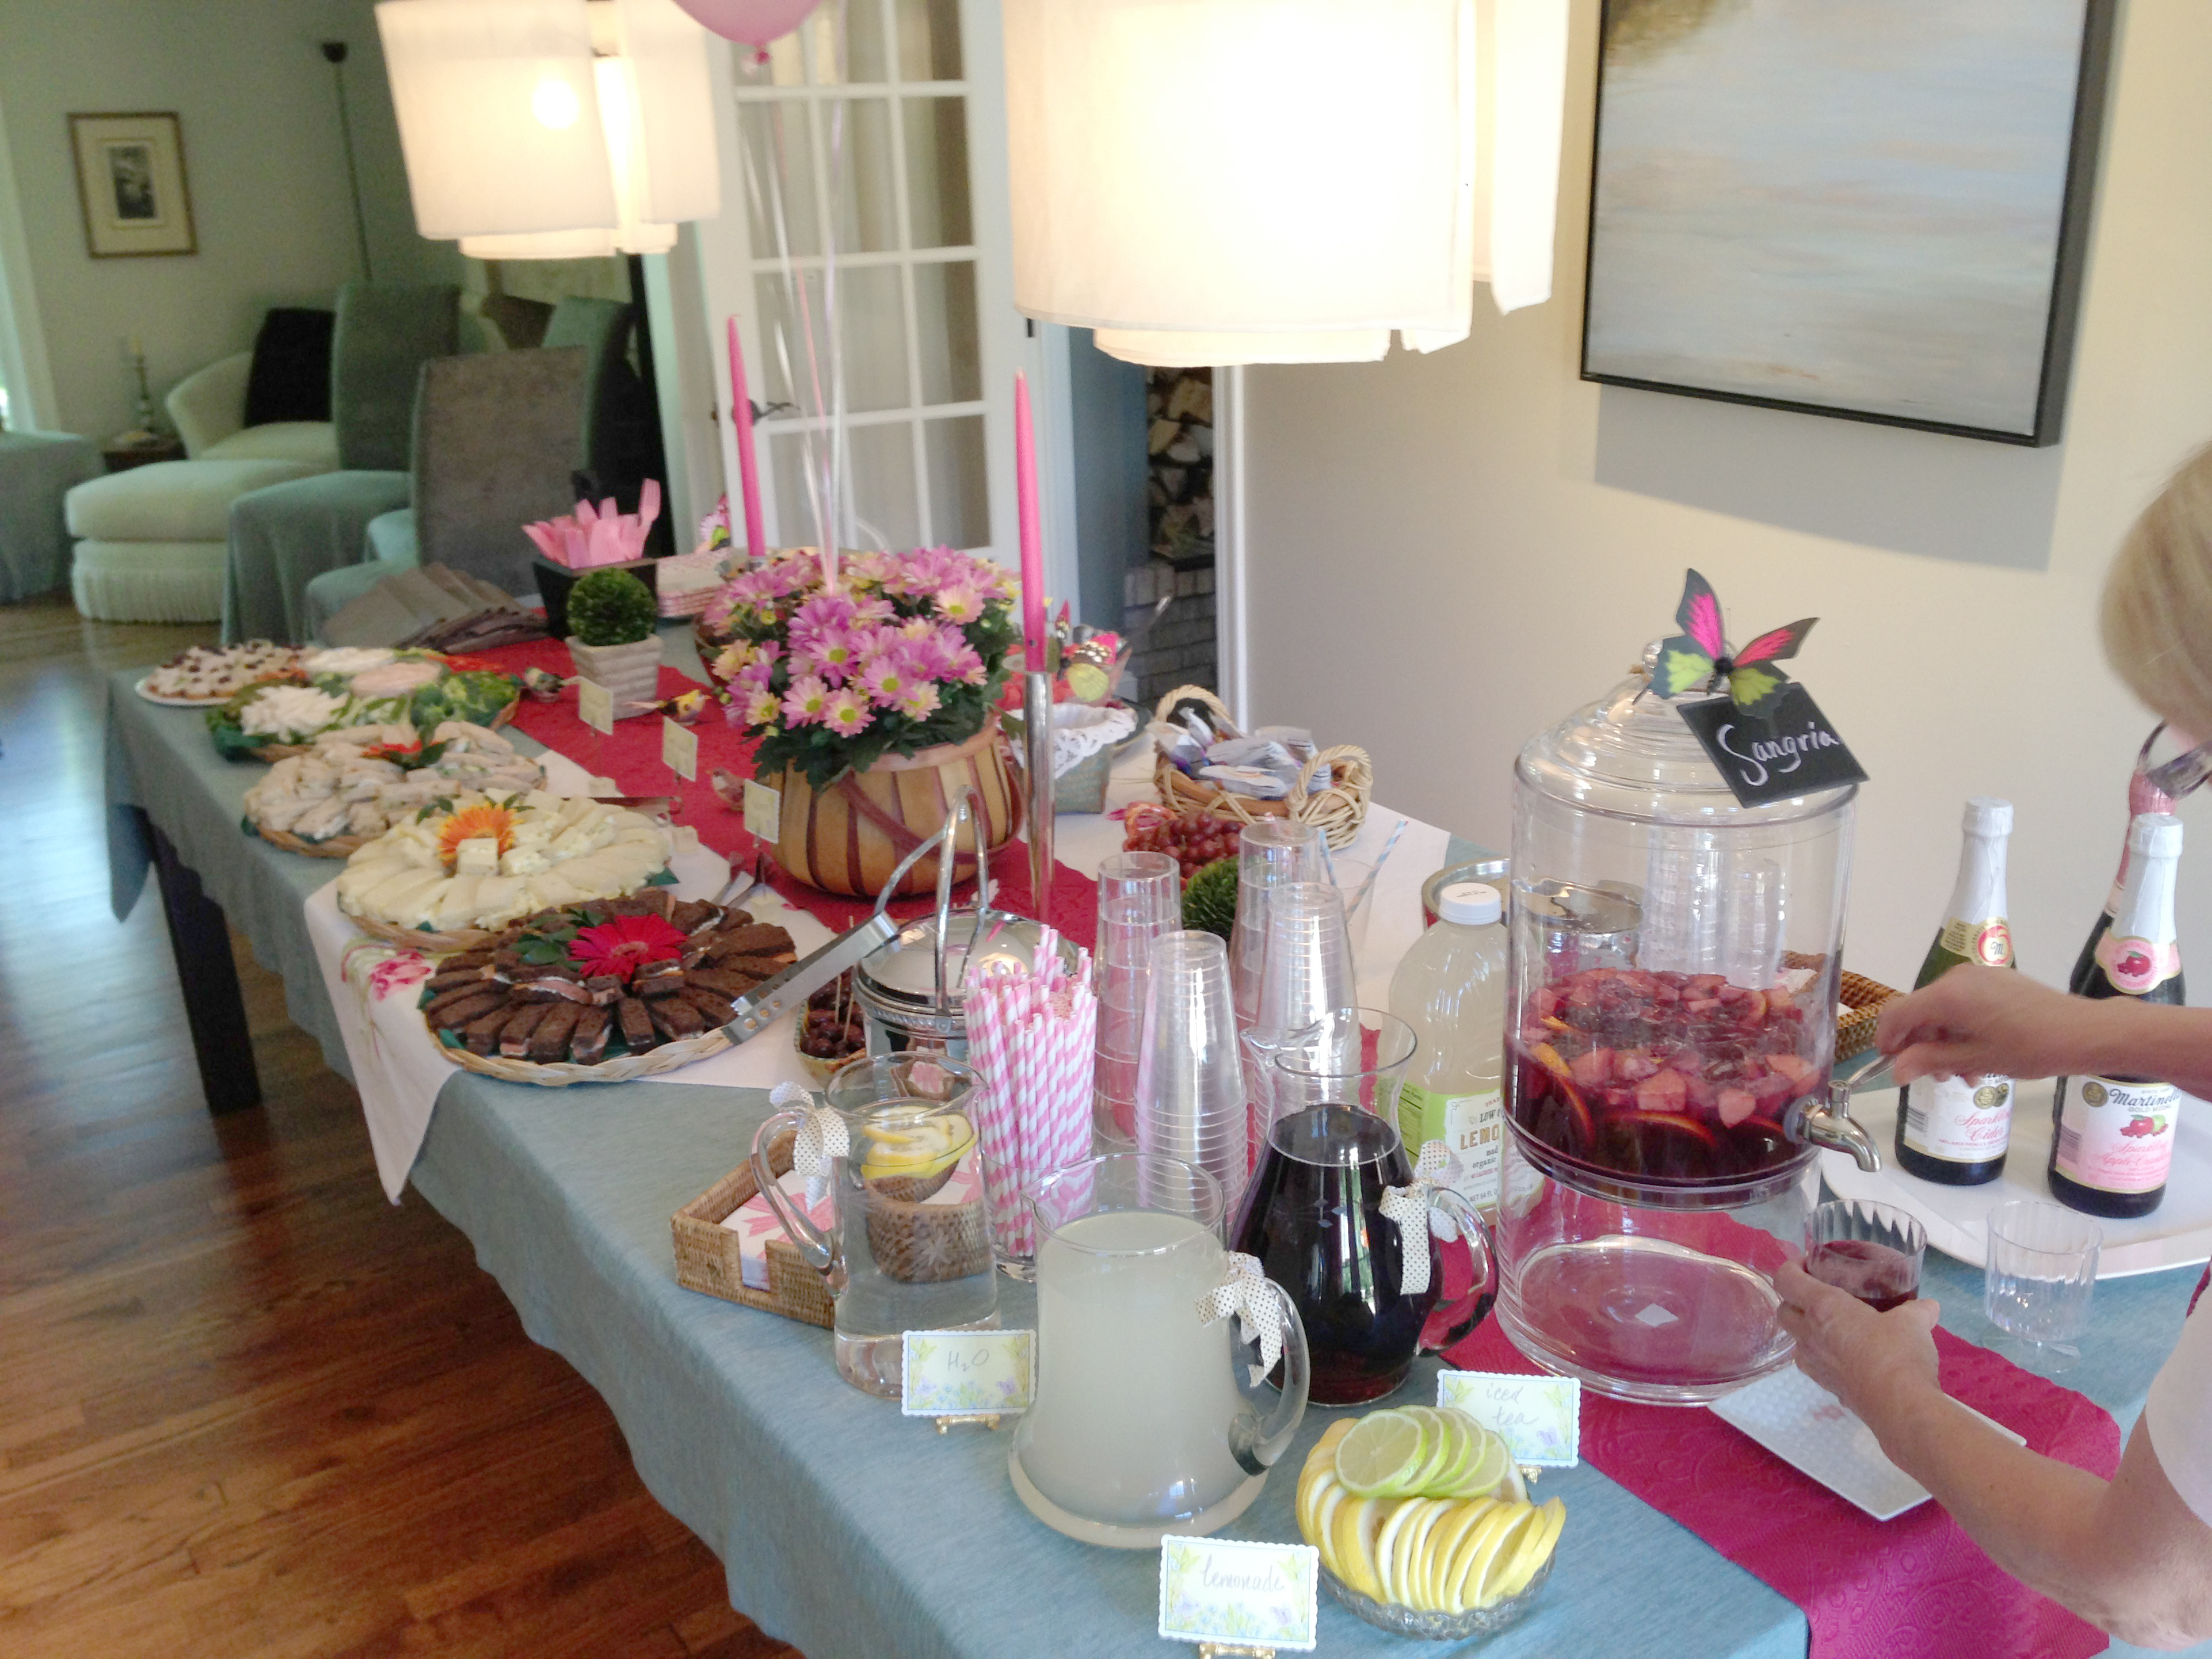
No matter! We’re here to talk about more important things, like what you’re going to serve to overnight guests on Christmas morning. Or to yourself tomorrow morning. Or right now.

See, every overnight at grandma’s house in Indiana ends the same way: with Pillsbury orange cinnamon rolls served on her white mellamine dishes with the green trim, right before loading up the car and heading home. The rolls don’t exist outside of grandma’s house.

Then I watched Joy the Baker’s episode of, “Bonkers Awesome,” featuring The Pioneer Woman, and the world stood still. These were happening—with or without a trip to the Hoosier state.

The moment Joy posted the recipe, the countdown till Project Bun was in the oven (and the end of the workday), began. Having never made a yeasted item in my life—besides that one accidental-and-regrettable Jamie Oliver-fried-pizza-dough situation all those years ago, for which I am still appologizing—the long recipe, complete with dough rising and resting times, seemed ominous.

Orange cinnamon rollsThe truth is, I’m a lazy baker. This explains why cookies spew from my house at such an alarming rate. Yet even I managed to pull through for these. They’re so good, it’s stupid.

Adapted from Joy the Baker’s Bonkers Awesome Pistachio, Orange, Dark Chocolate Cinnamon Rolls

Notes:

  • I like mine on the simpler side, but let me know how it goes if you add the pistachios and dark chocolate.
  • This dough is stubborn and took nearly three hours to rise, so fear not if yours isn’t perfectly pillowy after one.
  • If you have a dishwasher, run it once through with the dirty dishes from dough mixing, while the dough does its preliminary rise in a warm place in the kitchen. Once the cycle is finished, unload the dishes and place the covered pot of dough into the now warm-and-empty dishwasher, and close the door. Leave the dough there until it has achieved the desired fluffiness.
  • After the three-hour dough ordeal it was time for bed, so I popped it into the fridge overnight. The rolls still baked perfectly the next morning.
  • Go crazy with the orange zest! I’d recomment zesting two oranges—doubling the amount Joy calls for. In keeping, feel free to layer on the cinnamon and sugar; the more, the better.
  • Baking the rolls in a round pan (which was probably too small) left raw dough in the center of the pan and required much more baking time than the square Pyrex dish. Use the latter if possible.
  • Add 3 (or more tablespoons) of orange juice to the glaze. Just do it.
  • Rolls can be enjoyed equally whether eaten layer by layer, or as one giant blob.
  • Bonus: You will have a freshly squeezed glass of orange juice thanks to the leftover juice from the glaze.

photo (3)They are the perfect way to thank grandma for all the cinnamon rolls she’s made for you over the years. Happy baking!

Tagged , , ,

Lauren: Homemade Butterfinger candy bites

The bites, before being covered in chocolate.

The bites, before being covered in chocolate.

Have you ever been rudely awakened by the piercing banshee-like screech of the smoke alarm in your place of residence? Caro can attest to the handful of times this happened during our senior year of college. We still haven’t forgotten about you, third floor neighbors with the burnt popcorn habit.

Point being, this happened again today. Several unsuccessful attempts at sleep later, I decided to embrace the early morning wakeup call and do something. Clearly my first thought was to make what I’d been staring at on Pinterest all week—Butterfinger candy.

I’m really into Butterfinger. It’s flaky, and peanutty, and buttery, and seriously, what’s not to like? Upon viewing the candy of my dreams in picture form, and discovering that the recipe only requires three ingredients and a microwave, the decision was made and I got to work.

Homemade Butterfinger candy bar/bite:

(adapted very slightly from Six Sisters’ Stuff, although I was initially hooked by this photo from Daydream Kitchen)

Ingredients and supplies:

  • 1 lb. bag of regular candy corn
  • (one) 16 oz. jar of peanut butter—Note: I’d go with a natural peanut butter because there is so much sweetness coming from the candy corn and chocolate (this is my favorite).
  • 12 oz. bag of chocolate chips. Guittard chocolate chips. Or candy coating as the recipe calls for. I had no idea what that meant and didn’t feel like leaving my house if it turned out to be something I didn’t own, so, my laziness, and thus chocolate chips, won.
  • 9×9 in. baking dish—try to use Pyrex so that it can change temperature quickly and drastically without cracking.
  • Wax paper
  • Access to a freezer
  • Access to a microwave
  • A microwave-safe vessel in which to melt candy corn
  • Some sort of double boiling contraption—mine is very low-tech. Read: a pot with two inches of water in it, topped with a steel mixing bowl to house the chocolate
  • spatula/wooden spoon—NOT A WHISK. DO NOT MAKE THE SAME MISTAKE I DID! I.E. believing that the candy corn will ever liquify. While it certainly melts down and becomes pliable, it at no point actually liquifies, and if you try to stir with a whisk, the huge glob of candy becomes lodged within the cage of the whisk. So, STAY AWAY FROM THE WHISK.

Recipe:

  1. Use wax paper to line the bottom and sides (so that some overhangs the edge) of the 9×9 baking dish.
  2. Dump the contents of the bag of candy corn into a microwave-safe vessel, and microwave it on high for one minute.
  3. Remove the vessel and stir. Then place it back in the microwave and continue to microwave for 15 second intervals, stirring in between, until the candy corn totally melts.
  4. Stir peanut butter into the mixture and try to mix it as evenly as possible with the melted candy corn.
  5. Dump mixture into wax paper-coated baking dish and smooth out the top as evenly as possible with a wooden spoon/spatula. When that falls short, place another sheet of wax paper over the top of the mixture to press it into a flat-ish slab.
  6. Remove the top sheet of wax paper and place the dish to the side to wait for it to cool completely. Or, if you’re as impatient as I am, put it into the refrigerator or freezer until it has completely cooled.
  7. Once the mixture has cooled, remove it from the dish. I ran hot water over the bottom and edges of my Pyrex dish so that the mixture and wax paper would free themselves from the glass, and then inverted it onto a cutting board. I also ran a knife along one edge—between the candy and the dish—which dislodged the candy brick in one try. Once free, remove the wax paper.
  8. You may have to wait for the block to warm up a bit, but once it is cut-able (yes, that is now a word), cut into bars or wee bites like I did, and either melt the chocolate/candy coating in a double boiler and dip the flaky bars (mine didn’t have enough structural integrity to be dipped) into the melted chocolate, or, lay the pieces on a cooling rack with a washable cutting board (all of mine are plastic, don’t use a butcher block for this)/wax paper/parchment/foil/whatever underneath it to catch chocolate drips, and use a spoon to haphazardly paint chocolate onto the bars.
  9. Refreeze/refrigerate for the chocolate to harder, or, if you decided to forgo chocolate, eat!
The finished bites.

The finished bites.

I couldn’t quite believe how much this tasted like authentic Butterfinger. I also have zero idea how someone ever thought up this recipe, and figured candy corn would provide the correct texture, but it does, and they’re great, and you should try them immediately if not sooner. Now get out and enjoy the beautiful day! And Target’s 2 bags-for-$5 sale on candy corn.

Tagged , , , ,

Lauren: Summer Break is Over and We’re Officially One Year Old

Hello, and welcome back to Cooking with Copy. Our blog baby is celebrating its first birthday, so please help us blow out its imaginary birthday candle!

It has been a whirlwind/tornado of a summer and I’m glad to be back here with you. There were birthdays, and birthdays, and oh, did I mention birthdays? There were big family dinners upon big family dinners. There were holidays, anniversaries, baby showers, births, bridal showers, retirement concerts, parties, weddings, Blogshop, Ravinia concerts, trips to Portland, OR,  New York, NY, St. Louis, MO, Holland, MI, Madison, WI, and several trips to South Bend, IN, there were conventions (the National Stationery Show and the American Library Association Annual Conference), internships, and interviews, there were visits from friends and sisters and nephews and brothers-in-law, from my brother’s Argentine mothers-in-law and even from California cousins, and, most recently, there were weeks upon weeks (upon weeks, we’re still going) of packing and moving my grandparents into their new condo.

With only two weekends without plans, visitors, or travel from May until now, it’s no wonder my room looks like I’m the one moving. In between all of the plans this summer I found way too many pockets of time during which I made way too much food. This actually worked out for the best as there was almost always a guest, a workman, a party, or a special event that benefited from the food, but let’s just say I’ve met my butter/sugar/chocolate/carb quota for the year.

So, now that summer is coming to a close, are you ready to get this show back on the road with an epic 5-month-in-the-making recipe roundup? Great, let’s go!

Note: I didn’t take a photo of everything, but all of the recipes here link back to their original posts which do include beautiful photos.

Birthday baking:

  • Confetti Waffles
Simply make the batter according to the box directions and throw sprinkles in right before pouring batter into the iron.

Make the batter according to the directions on the box and throw sprinkles in right before pouring the batter into the iron.

Cupcake Puppy Chow (sans powdered sugar) comes together in 10 minutes.

Cupcake Puppy Chow (pre-powdered sugar coat) comes together in 10 minutes.

Notes: Omit butter, and add 1/4 tsp. salt and 1 tsp. vanilla extract to the melted almond bark/extract/heavy cream mixture

Grandma’s visits:

IMG_1715

Notes: This is just an ENORMOUS chocolate bar and would be better with twice the coconut and 1/3 the chocolate.

Father’s Day:

Baby shower:

Basic sangria is perfect for just about any summer event.

Things I learned this summer: Nothing makes women as thirsty as a baby shower. We had to refill the container twice.

Family dinners:

Make sure the buckle is THOROUGHLY cooked when you remove it from the oven. You may need to bake it longer than Tracy specifies. This one was totally raw in the middle.

Make sure the buckle is THOROUGHLY cooked when you remove it from the oven. You may need to bake it longer than Tracy specifies. The first one had to be thrown out because it was totally raw, adding baking time saved the second one though.

I CANNOT STOP EATING THESE AND IT'S A PROBLEM BECAUSE THEY TAKE FIVE MINUTES TO MAKE!!!

I CANNOT STOP EATING THESE AND IT’S A PROBLEM BECAUSE THEY ONLY TAKE FIVE MINUTES TO MAKE

Note: Make sure to freeze the chips until the last possible second so they don’t melt. Major, major bonus points if you use Guittard Milk Chocolate Chips. Can’t say enough good things about Guittard, every chip I’ve tried has been fantastic. I am totally willing to be a brand ambassador. Guittard, get at me.

Momofuku Milk Bar's birthday cake elevates your typical confetti to new heights.

Momofuku Milk Bar’s birthday cake elevates the typical confetti cake to new heights with a richer and more complex flavor than boxed versions.

This is crack. Do not make this if you don't want to risk eating the entire contents of the pan.

THIS IS CRACK. Consider yourself warned.

Notes: I bet a combo of confetti crumb and the confetti cake above would make kick-ass mix-ins in a homemade cake batter or vanilla ice cream…just saying.

Thai beef (sans fried egg) that every single person I've made it for, has loved.

Thai beef (here without the fried egg) has yet to meet a hater.

Notes: This recipe is easy, fast, and unique. It’s my fallback for nights when I don’t want to think about what to make.

These were just an excuse to injest a LOT of mini m&ms.

Let’s face it, these were just an excuse to ingest a LOT of mini M&Ms. Don’t look at me like that.

I used Marionberry jam because my sister brought us some as a gift, but you can use any kind of jam you'd like.

My sister brought us a jar of marionberry jam from Oregon which I was dying to use for these, but you can use any kind of jam/jelly you’d like.

  1. Sautee the kale until slightly soft and brighter green.
  2. Finish cooking and scrambling your eggs (or in my case, egg whites) and put into a bowl.
  3. Sprinkle cheese (I like mozzarella) on top.
  4. Get Excited.
  5. Eat.
Shortbread with peaches.

Butter with peaches, what’s not to like? Plus I’m a sucker for this red/orange/yellow color combo.

Peanut butter chip and chocolate chip granola bars.

A little too sweet, but worth a try with brown rice syrup instead of butter. They’re also perfect for shipping across the country.

Very poppy seed-y

Very poppy seed-y, kinda too sweet.

It's 93 degrees outside but this week I pretended it was fall with these frosted pumpkin cookies/cakes. They're really muffies, not cookies, and the frosting is too sweet, but they received recipe requests from people at my dad's office so here you go.

It might be 93 degrees outside but I pretended it was fall with these frosted pumpkin cookies/cakes. They’re really just glorified muffies, not cookies, and the frosting is too sweet and doesn’t fully set, but they received recipe requests from people at my dad’s office so here you go.

Happy September and welcome back.

Tagged , , , , , , , , , , , , , , , , , , , , , , , , , , , , , , , , , , , , , , , , , , , , , , , , , , , , , , , , , , , , , , , , , , , , , ,

Lauren: Linda’s Lemon Drizzle Cake

lemoncakewhole

I couldn’t cut into this cake because it was a gift, but look at the photo below to see the bright yellow interior.

Who likes Costco? MEMEME!!! Well sort of. Walking through the aisles and sneaking all sorts of delicious samples and Lululemon-esque yoga pants for $25 is great. But who needs a year’s supply of fruit snacks (my mother)? Or Cheerios (won’t they go stale?) Or lemons? Buying produce or dairy in bulk makes no sense to me unless you’re throwing a party. But that didn’t stop my mom from buying a bag containing enough lemons to last Martha a month (and that’s saying a lot).

I assumed this bag of lemons would simply waste away into little white shrivels since we’d never use that many before they went bad, but I was wrong. So wrong. In fact I personally used up the entire contents in three days. And it was all because of a recipe I found in a magazine.

While I’m not sure that I’ve ever read an issue of Town & Country, the April 2013 cover featured Allison Williams and, as the huge “Girls” fan that I am, that was that. Next thing I knew I’d paid for it, read the issue, and was zesting six lemons in the kitchen at 10 p.m.

The recipe is called Linda’s Lemon Drizzle Cake but I’ve renamed it the Lemony Snicket Cake because you can’t say the word lemony without me thinking of my beloved Mr. Snicket (and I’m not kidding, I was OBSESSED with these books and in fifth grade dressed as Violet Baudelaire for Halloween).

The cake is really easy to make, is doused in the most deliciously sweet-tart glaze EVER, and makes your kitchen smell like a dream. Even my niece was into it. What you don’t see: how she then reached out to grab some and had to be restrained. Not unlike me…

Anyway, are you ready for this recipe? Here we go!

Linda’s Lemon Drizzle Cake (or the Lemony Snicket Cake)—slightly adapted from the April 2013 issue of Town & Country magazine

Serves 6 (which means you get a rather large slice, SCORE!)

Ingredients:

  • Flour for dusting the pan
  • 1 stick unsalted butter, softened, plus more for greasing the pan
  • 3/4 cup superfine (granulated) sugar
  • 2 large free-range eggs, beaten
  • finely grated zest and juice of 3 lemons
  • 1 1/2 cups all-purpose or light spelt flour
  • 2 tsp baking powder
  • 1/4 cup milk
  • 1/2 cup confectioners sugar, sifted
  • a toothpick

Steps:

  1. Preheat oven to 350 degrees Fahrenheit and butter and flour a 9-inch nonstick loaf pan.
  2. In a medium mixing bowl, cream the butter and superfine sugar together with an electric mixer. Gradually beat in the eggs and mix until light and fluffy. Stir in the lemon zest, flour, and baking powder, and mix well. Add 2 tablespoons of the lemon juice and mix well again. Then beat in the milk.
  3. Pour the batter evenly into the prepared loaf pan and bake for 45 minutes.
  4. In the meantime, mix the remaining lemon juice and the confectioner’s sugar together in a small bowl or liquid measuring cup, preferably one with a pour spout, to make the glaze.
  5. When it’s ready, take the cake out of the oven and cool in the pan for 5 minutes. Then turn it out onto a plate WITH A LIP/RIM. Otherwise the glaze will run off of the plate and all over the countertop, floor, etc. Pierce the top of the cake all over with a thin skewer/toothpick. Spoon/pour the lemon glaze carefully and evenly all over the cake until all of it is absorbed. It may look as though your cake is sitting in a puddle but give it a few hours and it’ll soak up all of that sweet and tart glaze.
  6. EAT!!!

Lemons are bright and sour and, essentially summer in fruit form. If you too like citrusy, not-too-sweet desserts that can be eaten at any time of day, then please, go to Costco and buy yourself an economy sized bag of lemons to make this cake. I promise, this is all you’ll have left:

The first cake that I made for my family, one day after I baked it.

The first cake that I made for my family, one day after I baked it.

Lemony Snicket Cake would also make a delightful Mother’s Day breakfast, not unlike these Valrhona Dark Chocolate and Orange Buttermilk Scones. Just saying.

Until next time, happy Mother’s Day!

Tagged , , , , ,

Lauren: Cornbread four ways

From left to right: Joy the Baker's cornbread, grandma's buttermilk cornbread, Martha Stewart's buttermilk cornbread

From left to right: Joy the Baker’s cornbread, grandma’s buttermilk cornbread, Martha Stewart’s buttermilk cornbread

No, that’s not a typo. I did spend last weekend making four kinds of cornbread, the first one just wasn’t good enough to be photographed. The recipe requirements for this trial were that what I made needed to be cornbread, include buttermilk, and preferably, not be sweet. Let’s just say I changed my tune as the baking went on. And on and on and on.

The impulse struck on Friday when I could no longer resist the siren song of Matthew Amster-Burton’s recipe from Spilled Milk. I wasn’t in the mood for any sticky, gluey, muffin-like corn business and it was an exciting prospect to, for the first time, try a true, totally-savory, Southern-style cornbread with absolutely zero sugar or flour. The recipe called for an 8 in. skillet and silly me, I thought the fact that mine was about 10 in. wouldn’t matter. Yeah, no. Instead of thick and substantial, the finished product was thin, about a centimeter tall—more of a corn cracker than bread—and extremely bitter. Straight into the trash it went, sans photo. One plus for the recipe: you preheat the skillet (with oil in it) in the preheating oven, and when you pour the batter into the skillet it sizzles and starts cooking IMMEDIATELY. Not shocking. Nonetheless, my inner second grader found it exciting to behold.

Up next, the second trial and the palest of the bunch: Martha Stewart’s buttermilk cornbread. While better than contender one, due to the addition of 1/4 cup of sugar and 1 cup of flour, this bread was still pretty dry and not something I’d repeat after discovering breads three and four.

For the third recipe I trusted my first instincts, ignored up until that point, and went with the classic, moist and just-sweet-enough, grandma’s buttermilk cornbread from allrecipes.com which has an impressive 3,305 reviews, most of which are five-star. It was quite good, looked and tasted like the iconic cornbread with its golden color, and was the closest to the cornbread of my dreams I’ve found yet. We polished off about half the recipe. They’re especially delightful with butter.

Joy the Baker’s brown butter rosemary orange cornbread was the gold medalist of the Cornbread Taste Test of 2013. Fourth time was a charm (and my second time making this recipe) and only the three pieces in this photo avoided consumption (as in being eaten, not getting TB) and that was only because I hid them for photo purposes. The difference, and probably unfair advantage of this recipe? The additions of 1/3 cup of sugar, orange juice, orange zest, fresh rosemary, and browned butter which make this baby a star. The other secret: using instant polenta instead of cornmeal! The polenta I used was much finer and easier to chew than the cornmeal in the other three recipes.

From top to bottom: Joy the Baker's cornbread, grandma's buttermilk cornbread, Martha Stewart's buttermilk cornbread

From top to bottom: Joy the Baker’s cornbread, grandma’s buttermilk cornbread, Martha Stewart’s buttermilk cornbread

Well, I’m over cornbread now for at least the next year, so until next week I’m going to roll to bed. Enjoy your heat wave/ice storm/snow/tornado, and have a great weekend!

Tagged , ,

Caro: Almond-Crusted Chicken Breasts

***I’m catching up on old posts! This was my intended contribution to almond week.***

Hello, and welcome to the easiest meal ever. Like… started and served in less than 20 minutes. Simple as can be, and so good that I ate it for four days in a row and still craved more. Season some chicken, food-process almonds, garlic, and olive oil, top the chicken breasts with the resulting savory almond crumble, and bake. Dinnertime!

almond-crusted chicken breasts

This chicken is so fuss-free and foolproof that it seems wrong to spend an entire blog post talking about it. So I’m going to talk about other things instead. Humor me.

1. I have a huge crush on Kid Cudi (even when he’s wearing a Hendrix wig).

2. Have you heard of this project called You Are My Wild? Every week, 14 photographers each take a picture of their child(ren), and the resulting images are gathered and posted to the project’s page. It’s suuuch a moving project… the collections of photos are gorgeous, and it’s fascinating to see how the different photographers choose to capture their little ones. Go ahead, look through some of the shots. Isn’t it kind of amazing, how much of a kid’s spirit can come through in just one picture?! It makes me want to develop photography skills just so I can have kids and take pictures like this of them.

3. I’ll probably fall in love with all 14 of the YAMW photographers as I check ’em out, but for now I’m already head over heels for Shelby Brakken. I like the travel section of her website, but it’s her photographs of people that totally sparkle. Oh my gosh. They’re inspired and bursting with the kind of beauty and emotion and personality and LIFE that photography should be about all the time. Stunning!!! I want to print these pictures and show them to everybody and hug all the people in my life for their uniqueness. I think I’m crazy.

4. If you know me, you know my love for sequins knows no bounds… so why will I never be able to afford these two dresses? And why will I never have an occasion that requires a floor-length sequin-covered gown? Sighhh.

5. Mika, who’s made top 3 in my list of favorite people of all time, teamed up with director Cristián Jiménez to create a short film in place of a typical music video for his song “Origin of Love.” It’s one of those songs that just feels so big and anthemic, but not in a cheesy, “Imagine Dragons” kind of way—Jiménez says “it almost feels like you can touch [the song]”—and I really didn’t think it could get any better, but the film brings it to life, and vice versa, and it’s just super beautiful. I keep watching it and getting teary-eyed, right at the bridge of the song. It’s love! I don’t know if this couple is in love in real life, but I 100% believe they are. Gah. Go watch it!

6. EASTER CANDY is in stores! And Easter is about to pass us by, which means Easter candy is about to go ON SALE!!! Sorry in advance, pants. It’s gonna be restrictive-waistband-free clothing up in here for a while.

That was fun! Now back to the chicken. I love this because you don’t have to worry about over-browning or burning one side of the chicken on a temperamental skillet. Just pop it into the oven, and come back to flawlessly cooked chicken in 15 minutes. (There’s an audience of people yelling “Set it, and forget it!” in my head.) I also love this because oven-baked chicken has always failed me in the past… dry and odd in texture. But this one bakes up so perfectly juicy, it’s insane! I think the almond topping must seal in the juices somehow. I also love love love the crunch of the almonds coupled with the chicken… texture party!

almond-crusted chicken breasts

Serve it alongside rice or veggies, or be like me and serve it with mac and cheese. Any way, it’s one of my favorite new weeknight dinners. Make it one of yours!

Click here for the recipe!

Tagged , ,

Caro: “The Ultimate Macaroni and Cheese” (Panera at Home)

***I’m catching up on old posts! This was my intended contribution to mac and cheese week.***

Omgomgomg. YOU GUYS.

Have you ever made mac and cheese at home from scratch? Does the same thing happen to you that happens to me where no matter how much cheese I add in, it always kind of just tastes like pasta in a vaguely cheese-flavored cream sauce that is wholly unsatisfying? Is that something that only happens to this girl? I don’t know… I don’t know.

I’ve only made plain mac and cheese from scratch a couple of times, but I’ve never found a recipe worth repeating. I did hit a jackpot of sorts when I made that jazzed up pumpkin mac and cheese in the fall, but I’ve never triumphed with a straight cheese and pasta recipe devoid of other ingredients to punch up the flavor. I always end up disappointed by the lack of that perfectly sharp cheesy flavor that makes me crave my favorite restaurant mac and cheeses by the bucketful. Womp, womp.

(For the record, my favorite mac and cheese of all time comes from Mr. Moes in Coconut Grove. The service sucks, and the tables and floors are always kind of sticky, but I keep going back, because HOLY GOODNESS have they nailed mac and cheese at its very best. A bowl of half-melty, half-stringy cheese with a handful of noodles swimming in it. It’s super rich and tastes cheesy beyond belief and is absolutely perfect, and I’m always fully satisfied after a helping. Dang, now I want some…)

Aaanyway. So this is how my mac and cheese creation attempts usually go. I’ll desperately crave mac and cheese, get all ambitious and excited, and try a new recipe, and then I’ll be like, “Why did I do that? That was a waste of time and cheese that I very well could have eaten straight.” After lamenting the poor use of perfectly yummy cheese, I’ll think of where I can go to get my mac and cheese fix as quick as possible (a.k.a. not from a sit-down restaurant), since you can’t leave a mac and cheese craving unsatisfied. When I was in St. Louis, I’d go to Noodles & Co. cause it was super close to campus, but since we don’t have those around here, I usually end up at Panera, which is cool cause I LOVE Panera.

Their mac and cheese is about as simple as it gets… no bread crumbs, no baking for crispy corners, no extra cheese on top. Noodles and sauce. But you know what? It’s still one of my favorites ever! I mean, really, when I crave comfort food, that’s all I want. Cheese and carbs and warmth, no frills.

SO. Imagine how excited I was when I thought I should look up copycat recipes for Panera’s masterpiece for mac and cheese week, and I found their recipe… on their website… from their head chef! It doesn’t get more legit than that, so I had a feeling I was on my way to my first truly successful (in other words, worth making again) at-home pared-down mac and cheese.

Guess what. I was right!!!

photo

Ok, so maybe this doesn’t taste exactly like the mac and cheese you get at Panera. But that’s because restaurants use crack or something in their dishes to make them addictive enough for you to keep spending your cash monies on them. This is as close as you’ll ever get to Panera at home… and it is le awesome. Why? 1. It actually tastes like CHEESE! Glorious. 2. It reheats better than any mac and cheese I’ve ever made. 3. It’s so easy… no oven or fancy garnishes or anything complicated. One saucepan (two if you wanna get fancy and make the cheese sauce while you boil the pasta), one bowl, one cheese grater, one measuring cup. Minimum effort, maximum payoff.

Success! Mac and cheese at home that is simple, hits the spot, and is worth making again, and again, and again. At last!

photo (1)

Get. On. This.

Click here for the recipe!

Tagged , ,

Caro: Chocolate Raspberry Truffles

***Sigh. I disappeared again 😦 …

I don’t want it to be this way. But something about working 11-hour days at the office and trying to make the most of Fridays, Saturdays, and Sundays with people I will only be with for a few more weeks robs me of both my time and my motivation to cook/bake, clean up, photograph, write… but I’m trying, really. The kind of funny part is that I’ve kept up with the creating and “photographing” (with Camera+ on my iPhone, as I may or may not have misplaced my parents’ fancy D-SLR…) for every single week, but then I realize I have yet to edit the pictures (for whatever that’s worth) and I have yet to write the post, and, well, it just doesn’t feel like there’s enough time. I know, I know, people juggle a lot more than what I have on my plate… but I’ve never been known for my time management skills, and somehow the hours escape me. “I’ll do it tonight” becomes “I’ll do it tomorrow” becomes “I’ll have more time for this over the weekend” becomes a fridge full of food that has yet to be shared with the world via our little corner of the internet.

But anyway. All that rambling to let you know that I’m still alive, and I’m still cooking and baking, and hopefully there’ll be a lot more of me around here as my Tampa adventures wind down.

And, if it helps make up for my absence at all, today I bring you chocolate. (Yay!)***

Are you a fan of the combination of chocolate and raspberry? Truth be told, I used to hate it. HATED every raspberry-flavored thing I tried for years and years, so I eventually stopped trying raspberry-flavored things. Raspberry and I spent years apart before we were fatefully reunited one day…

(*Cue flashback initiation sequence*)

Lauren and I were lucky enough to go to pretty much a “foodie” university. Our dining halls had Indian, Mexican, Chinese, comfort, etc. food stations, and all the food was way awesome. But despite all this variety, my favorite part of the Wash. U. dining experience was the dessert case in the cafe (no surprise there!) that came as part of the new construction that went down while we were students. I would walk by it every single day just to see if there was anything I needed to try. Lauren and I spent so many nights with three desserts spread across a table, taking bites of and judging each one.

And one day, I spotted this slice of a chocolate pound-cake/loaf kind of deal that I HAD to have. It looked impossibly moist and just totally irresistible. So I bought a slice, duh, (maybe two…), and ventured home, nestled into bed, took a bite.

Well, it was so super amazing, obviously. I kept thinking it was chocolate and something else, and I couldn’t even pin down what the other flavor was… until my fork hit a little pocket of jam. I tried the jam alone, and that’s when it hit me. Raspberry! And chocolate! Chocolate raspberry, and I loved it. Converted!!!

And so, when I was thinking of what to make for Valentine’s week, chocolate raspberry something was a no-brainer. I settled on truffles pretty quickly, since I’ve always wanted to make them and spending $10/mall visit on Godiva truffles was really putting a dent in my budget, considering how often I go to the mall.

chocolate raspberry truffles

Ok. Here’s the thing. These were AWESOME. So, so awesome. So very wonderful, in fact, that my friend would not believe me when I told him I made them. (As if the fact that I offered them to him in a Tupperware container wasn’t enough of a hint…) So, they’re probably almost as good as the best truffles you’ve ever had unless you live in Belgium or something. Maybe.

photo (3)

BUT… they are a LOT of work. At least they were for me. First they were too soft to roll into little truffle-y shapes, so I refrigerated the chocolate blob for an extra hour… which led it to harden to a rock-like consistency, which made it impossible to scoop any shapes out at all. So I ended up microwaving that blob until it was manageable… and then I used a knife to, in ruthless caveman-like fashion, carve out chunks of chocolate, which I then had to let sit and soften until they could be rolled into truffles, which I then had to freeze. AHH! So much temperature particularity to make these handle-able! It was a little too much for me.

So as good as they were, I probably won’t be making them again soon. The value of a recipe like this, though, is that you can adapt it any of nine billion ways… so next time some crazy chocolate combo pops into my head, I might whip up a batch of these just to say I made my own peanut butter potato chip truffles or white chocolate strawberry basil truffles or something. You know? Yep.

Anyway. Try these if you need a kitchen project to keep you busy! Maybe you’ll have more luck than I did at making the whole process manageable… but in any case, you’ll end up with perfect truffles, or goofy-looking little chocolate blobs, or a bowl of raspberry-infused dark chocolate goodness. Win, win, win!

Click here for the recipe!

Tagged , ,

Lauren: Cheese Crack(ers)

cheesestarsI beamed down from the planet Cheese. Seriously. During my junior year of college I nearly subsisted on wedges of Laughing Cow Light Cheese alone. Well those and salads, but come on, we all know salad is just an excuse for cheese. I feel similarly about my daily egg whites. What fun are they without shredded mozzarella? Most recently I’ve embraced eating Granny Smith apples with a few bits of cheddar. You could say cheese is my crack.

It makes sense then that from the moment Molly Yeh posted about her homemade sriracha gouda cheese-its, I needed them. My random interest in crackers was slow to catch fire as you might imagine as they are arguably the world’s most boring food. First I read about Joy’s sharp cheddar cheese (and chili cheese) crackers, then Molly Wizenberg’s oatcakes. And by the time Molly Yeh posted about her cheese-its, which feature my all-time favorite—SMOKED GOUDA—my cracker-love was blazing.

I made three different kinds of cheese crackers last week. Yeh’s, and both of Joy’s. This crunchy kitchen showdown yielded one reigning champ—a hybrid. It mixes many of the ingredients in Joy’s chili cheese crackers with Yeh’s dough base and baking times.

Ready to cook some crack?

Chili Cheese Crackers

Ingredients:

4 tbs. unsalted butter at room temperature

8 oz. cheddar cheese (I used a 2 year aged block of yellow cheddar)

1 cup all purpose flour whisked with:

  • around 1/2 tsp. garlic powder
  • 1/2 tsp. chili powder
  • 1/4 tsp. paprika (smoked if you have it, I didn’t)
  • Joy also adds ancho chili powder but I didn’t have any
  • 1/2 tsp. salt
  • 1/4 tsp. coarsely ground black pepper

Recipe:

  1. Preheat the oven to bake at 350 degrees and place rack in the upper third of the oven.
  2. Throw all ingredients into an Oscar or other small-ish food processor and mix until it comes together into a dough. You can also mix the dough with a pastry knife if you’re feeling old school or don’t have access to a food processor. It’s just more annoying.
  3. Put a piece of parchment paper down on a flat surface and use a rolling pin to roll out the ball of dough until it’s 1/8 in. thick.
  4. Break out the cookie cutters! I made mini moons, tiny hearts, and small stars. You could also use a pizza cutter à la Molly and make simple rectangles. Collect the scraps and repeat until you’ve used all the dough.
  5. Arrange the cut crackers on the parchment atop a cookie sheet. The crackers don’t expand much in the oven so feel free to use every inch of the parchment.
  6. Bake the crackers in the upper third of the oven for 20 minutes. Err on the side of over-baking. They get crunchier the longer they’re in the oven. Until they turn black. Then you’ve probably overdone it.
  7. They get a little greasy since you are melting cheese and butter after all, so I immediately placed the crackers in a single layer on a paper towel after removing them from the oven but this is optional.
  8. Just try to stop eating them.

cheesecrackers2If you’re at all spice-phobic these are your gateway drug. Despite what sounds like an ample amount of hot stuff present, the crackers are quite subtle and the intense cheesiness is what really comes through. The spices just give the crackers a nice toasty flavor. I swear this tastes like the actual recipe for Goldfish.

Until next week, farewell from the land of fromage!

Tagged , , ,

Lauren: Almond Butter Cup Smoothie

smoothieSometimes you want to spend an hour washing kale leaves for a salad and other times you just want to throw a bunch of stuff in a blender and press liquify. Almonds as this week’s pick allow me this opportunity to rest on my laurels.

You should know that in addition to my temporary sloth, I’m a little odd. I’m one of those people who actually prefers cold things to hot—even in sub-zero conditions. Soup for your cold? Nah, I’ll take ice cream. Oh, it’s -4 outside? Let’s make sno-cones. And for post-workout mid-blizzard munchies? An almond smoothie. It might feel like a brick in your stomach but it’s the best kind of brick. It actually solves the winter “I-can’t-stay-full” predicament and that is reason enough for a prize.

This smoothie, originally from Daniel Sage at Juice Press in New York, has been a fixture in my repertoire for the past few weeks and it is finally time to debut it to you, our lovely readers. While it may not be the prettiest smoothie ever, it sure is tasty, and did I mention it has no added sugar? Yep. None. It’s absolutely bursting with protein and the warming cinnamon thrown in doesn’t hurt either, especially during this latest round of snowstorms. Almonds are the shining stars of this recipe and appear in two forms—butter and milk. I have an odd fascination with grinding my own almond butter at The Fresh Market, but any kind will do. That plus unsweetened cocoa powder (this one is fantastic) and a banana and you’re golden. The recipe suggests adding agave nectar but I don’t see a point.

Now I’m going to go back to wearing my comforter around like that’s a thing. Cheers.

Recipe here. And if you have leftover almond butter lying around, may I recommend The Unrefined Kitchen’s almond butter dark chocolate chip cookies? Haven’t tried them but they look lovely.

Tagged , , ,